

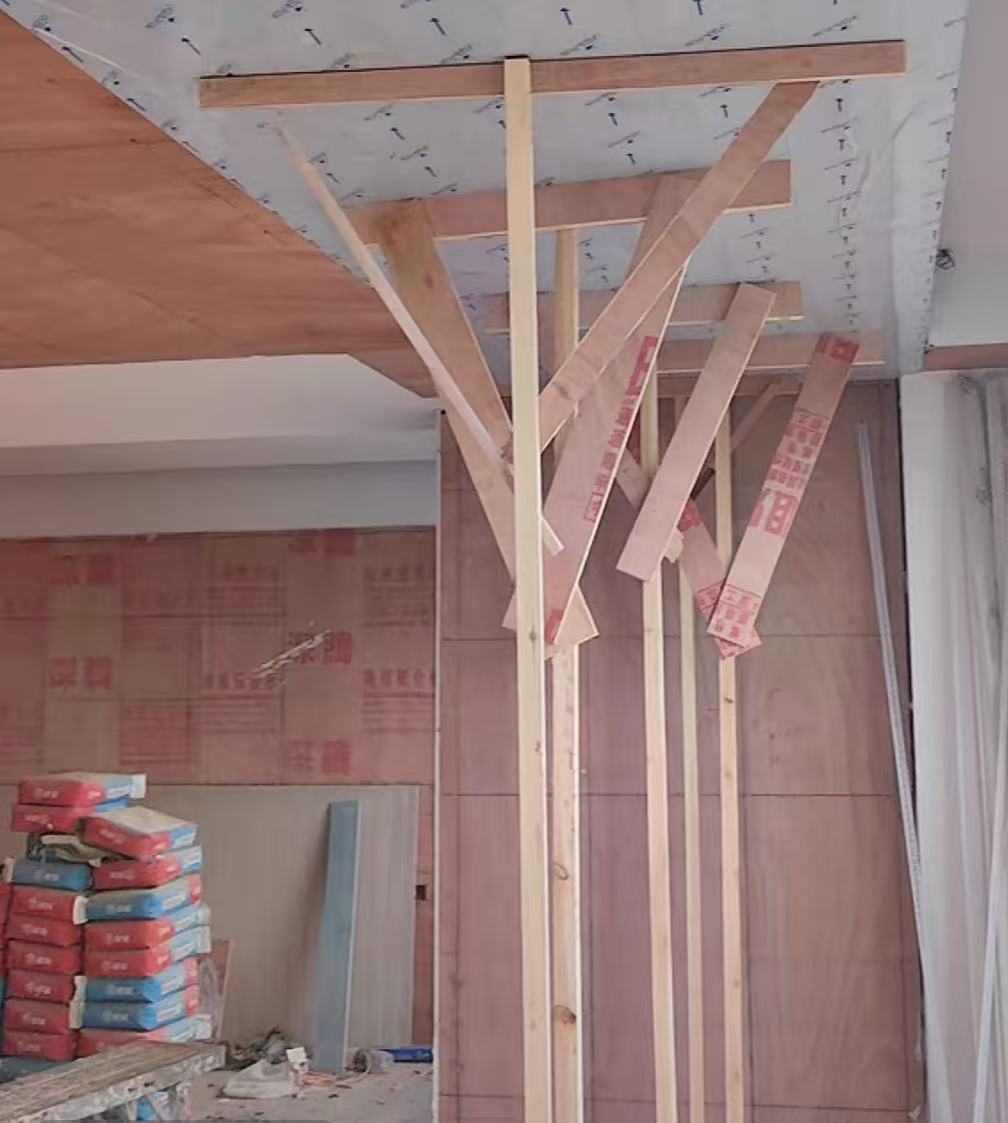
Complete Guide for Wall, Ceiling and Column Applications
Proper installation of stainless steel decorative sheets requires careful planning, the right tools, and attention to detail. Whether you are installing mirror finish panels in a hotel lobby, brushed sheets on elevator walls, or colored panels on feature columns, the installation method determines the final appearance and longevity. This guide covers three primary installation methods—wood base backing, structural framing, and direct adhesive application—along with tool requirements, seam treatment, protective film removal timing, and essential precautions.

Three Primary Installation Methods
Method 1: Wood Base Backing
This is the most common method for indoor wall and ceiling applications where the substrate requires leveling and a secure bonding surface. The wood base provides a flat, stable foundation for adhesive attachment.

Application scenarios:
-
Hotel lobby wall panels
-
Villa interior feature walls
-
Elevator cabin interiors (indoor, low-moisture environments)
-
Ceiling installations with controlled humidity
Procedure:
-
Substrate preparation: Inspect the wall surface for flatness. If unevenness exceeds 10mm, use padding between the wall and the wooden frame to correct it.
-
Frame installation: Install wooden battens (typically 30mm × 50mm section) at spacing of 500-600mm, secured to the wall with 12-16mm wall anchors. Wood frame spacing can be extended to 800mm if base board thickness is 12mm or more.
-
Base board fixing: Fix plywood or MDF board (typically 10-12mm thick) to the frame using 30-35mm nails or screws at 200mm intervals. Ensure all nail heads are countersunk below the board surface.
-
Panel installation: Apply high-strength construction adhesive evenly to both the base board and the back of the stainless steel sheet. Position the panel carefully and press firmly. Use a soft mallet and a wooden block to gently tap the panel surface, ensuring full contact and eliminating air bubbles.

Method 2: Structural Frame with or without Base Board
This method uses either steel stud framing or welded angle steel as the structural support. It is suitable for larger installations, outdoor applications, and areas where additional structural strength is required.

Application scenarios:
-
Outdoor building facades
-
Large-area wall cladding
-
High-impact areas requiring extra durability
-
Ceilings where weight bearing is a concern
Procedure:
-
Frame installation: Install light-gauge steel studs or welded angle steel according to structural design. Check verticality and flatness throughout the installation.
-
For thickness ≤1.2mm (with base board): Fix a 5-12mm plywood base board to the steel frame using self-tapping screws. Drill pilot holes through the steel frame first to ensure secure attachment. Screw heads must not protrude above the base board surface.
-
For thickness >1.2mm (without base board): Directly fix the pre-fabricated stainless steel panels to the steel frame using stainless steel screws or direct welding.
-
Panel fixing: When using adhesive on base board, apply evenly to both surfaces and press firmly. When using mechanical fixing, pre-drill holes and secure with appropriate fasteners.
Method 3: Direct Adhesive Application
For smaller installations on already flat, stable surfaces (e.g., existing tiled walls or drywall), direct adhesive application may be appropriate. However, this method is generally not recommended for mirror or colored panels where telegraphing of substrate imperfections is a concern.
Application scenarios:
-
Small decorative accents
-
Areas with perfectly flat existing surfaces
-
Temporary installations
Considerations:
-
Substrate must be completely flat, clean, and dry
-
Not recommended for areas with temperature fluctuations
-
Limited to indoor, low-impact applications
Tools and Equipment Required

Cutting and Fabrication Tools
| Tool | Purpose |
|---|---|
| Angle grinder / Cutting machine | Cutting stainless steel sheets to size; requires grinding wheel suitable for stainless steel |
| Shearing machine | For straight-line cutting of sheet material |
| Bending machine | For forming edges and fabricating custom shapes |
Installation Tools
| Tool | Purpose |
|---|---|
| Electric drill / Impact drill | Drilling holes in walls, steel frames, and base boards |
| Screw gun | Driving self-tapping screws into steel frames |
| Welding equipment | For welded angle steel frame construction |
| Leveling instrument | Ensuring horizontal and vertical alignment |
| Plumb bob | Vertical reference for frame installation |
| Measuring tape / Ruler | Accurate dimensioning and spacing |
| Marking pen | Layout marking on panels and substrate |
Quality Inspection Tools
| Tool | Purpose |
|---|---|
| Square / Right-angle ruler | Checking panel squareness and corner accuracy |
| Level ruler / Spirit level | On-site levelness verification |
| Coating thickness gauge | Verify PVD coating consistency (for colored panels) |
Fasteners and Consumables
| Item | Purpose |
|---|---|
| Construction adhesive / Contact adhesive | Bonding panels to base boards |
| Stainless steel screws | Mechanical fixing of panels to frames |
| Self-tapping screws | Securing base boards to steel frames |
| Sealant / Silicone sealant | Filling seams and providing waterproofing |
| Wooden wedges / Blocks | Temporary support and leveling during installation |
| Protective film | Surface protection during handling and installation |
Seam Treatment: Decorative Trim vs. Direct Joint
Proper seam treatment is critical for achieving a professional finish and preventing future issues. There are two primary approaches:

Option 1: Decorative Trim / Stainless Steel Channel
This method uses pre-formed stainless steel trims (U-channels, L-angles, or flat strips) to cover the joint between panels.
Best for:
-
Visible transitions between panels
-
Corner joints (internal and external)
-
Areas requiring a defined design line
-
Compensation for minor installation inaccuracies
Procedure: Leave a precise 1.5-2mm gap between panels. Apply structural adhesive inside the gap. Press the trim strip (same material and thickness as the panels) into position, ensuring it sits flush with the panel surface. Use positioning clamps to hold until adhesive cures.
Advantages:
-
Clean, deliberate design line
-
Hides minor misalignments
-
Provides structural reinforcement at joints
-
Easy to clean, minimal dust collection
Disadvantages:
-
Higher material and labor cost
-
Requires precise pre-planning
-
Trim color must match panel finish exactly
Option 2: Direct Butt Joint / Sealant Fill

Panels are installed edge-to-edge with minimal gap, filled with matching color sealant.
Best for:
-
Minimalist design aesthetic
-
Budget-conscious projects
-
Areas where uninterrupted surface is desired
Procedure: Panels are cut precisely to size and butted together. A thin line of sealant is applied, and the surface is smoothed with a wet finger or specialized tool. Masking tape is applied to the panel edges before sealant application to prevent contamination.
Advantages:
-
Clean, uninterrupted appearance
-
Lower material cost
-
Faster installation
Disadvantages:
-
Less forgiving of installation errors
-
Sealant may yellow or shrink over time
-
Surface may telegraph if substrate is uneven
Seam Width Recommendations
| Application | Recommended Gap |
|---|---|
| Indoor standard joints | 1.5-2mm |
| Indoor design joints | 3-5mm |
| Outdoor installations | 5-8mm (to allow for thermal expansion) |
Important: For outdoor installations, the larger gap is essential to accommodate thermal expansion and prevent panel buckling.
Protective Film Removal Timing

The protective film on stainless steel decorative sheets serves to prevent scratches and surface contamination during handling and installation. Removing it at the correct time is critical.
When to Remove
Best practice: Remove the protective film as soon as installation is complete and the surface has been cleaned.
Specific guidance:
-
For indoor projects: Remove within 7-14 days of installation
-
For outdoor projects: Remove immediately after installation completion
-
For ceiling installations: Remove after all work above the ceiling is complete and dust has settled
Why Timely Removal Matters
Reason 1: Low-quality protective film left in place for extended periods can degrade (powdering effect) and become extremely difficult to remove. Worse, it may leave stubborn adhesive residue on the stainless steel surface.
Reason 2: Sunlight exposure (especially outdoor installations) accelerates film degradation. The adhesive layer may bond permanently with the panel surface.
Reason 3: Delayed removal can result in the film “baking” onto the surface, requiring chemical solvents or scraping that may damage the finish.
What to Do If Film Is Difficult to Remove
-
Use a heat gun on low setting to soften the adhesive
-
Peel slowly at a shallow angle
-
If residue remains, use isopropyl alcohol or specialized adhesive remover (test on hidden area first)
-
Wipe clean with soft cloth after removal
Ceiling Installation: Temporary Support Requirements
Stainless steel ceiling panels require temporary support during adhesive curing to ensure proper bonding and prevent panel sagging or detachment.
Support Method
Procedure: After applying adhesive and positioning the panel, use wooden props or telescopic ceiling supports to hold the panel firmly against the substrate. Place wooden blocks between the support and the panel surface to distribute pressure evenly and prevent surface damage.
Support Duration
Minimum curing time:
-
In temperatures 20°C–30°C: 24-48 hours
-
In cooler conditions (10°C–20°C): 48-72 hours
-
Below 10°C: Extended curing time required; may need 72+ hours
Important: Do not remove props until adhesive has fully cured according to manufacturer specifications. Adhesive failure at this stage can result in panel detachment and potential safety hazards.
Ceiling Installation Cautions
-
All work in the ceiling cavity (ductwork, wiring, insulation) must be completed before panel installation
-
Ensure proper ventilation to avoid condensation behind panels
-
In high-humidity areas, consider corrosion-resistant substrates and adhesives
Additional Installation Precautions
1. Material Inspection Before Installation
Check all panels before installation:
-
Confirm color consistency across all panels (batch numbers should match)
-
Verify surface finish is free from scratches or defects
-
Inspect protective film integrity
-
Confirm dimensions match shop drawings
2. Handling and Protection
Stainless steel decorative sheets are susceptible to surface damage during handling:
-
Always wear clean gloves when handling finished surfaces
-
Use suction cups or lifting equipment for large panels
-
Keep protective film intact throughout cutting and fitting
-
Cut panels on a clean, soft surface (not directly on concrete or rough floors)
-
Remove metal shavings immediately to prevent surface contamination
3. Adhesive Application Considerations
-
Apply adhesive at recommended temperature range (typically 5°C–35°C)
-
Do not use heat lamps or open flames to accelerate adhesive curing
-
Allow adequate drying time before applying pressure
-
Avoid excessive adhesive squeeze-out; clean excess immediately
4. Environmental and Safety Considerations
-
Outdoor work should be suspended during rain or high-humidity conditions
-
Use appropriate personal protective equipment (safety glasses, gloves, dust masks)
-
When welding, use proper welding curtains and ventilation
-
Ensure electrical tools have appropriate safety guards
5. Cleaning After Installation
-
After protective film removal, wipe the entire surface with a soft dry cloth
-
Remove any adhesive residue with appropriate solvent (test first)
-
Use only non-abrasive cleaners specifically formulated for stainless steel
-
Always wipe in the direction of the grain (for brushed finishes)
Common Installation Mistakes to Avoid
| Mistake | Consequence | Prevention |
|---|---|---|
| Uneven substrate not corrected | Panel surface shows ripples and distortions | Check flatness with straightedge; correct before installation |
| Leaving protective film too long | Film degrades, leaves adhesive residue | Schedule film removal immediately after completion |
| Dot-and-dab adhesive application | Panels warp or show “oil canning” effect | Apply full-coverage adhesive evenly |
| No allowance for thermal expansion | Panel buckling (especially outdoor) | Leave adequate seam gaps for expansion |
| Improper handling (bending panels) | Permanent surface deformation | Use proper lifting equipment; store flat |
| Not checking batch color consistency | Visible color differences between panels | Match batch numbers; order extra material from same batch |
| Screwing too close to panel edges | Panel edge cracking or distortion | Maintain minimum edge distance (≥10mm from edge) |
| Working below minimum temperature | Adhesive failure | Monitor temperature; use appropriate adhesives |
Quick Reference Checklist
| Phase | Check Items |
|---|---|
| Pre-installation | □ Substrate flatness verified □ Frame installed and leveled □ Batch numbers match □ Tools prepared □ Safety equipment ready |
| During installation | □ Protective film intact □ Adhesive applied evenly □ Panels aligned correctly □ Seams consistent □ Temporary supports in place (ceiling) |
| Post-installation | □ Film removed within recommended timeframe □ Seams sealed/finished □ Surface cleaned □ Quality inspection completed □ Final photos documented |
Frequently Asked Questions
Q: How soon after installation can I remove the protective film?
A: For indoor projects, remove within 7-14 days. For outdoor projects, remove immediately upon installation completion. Leaving film on longer risks degradation and difficult removal.
Q: Can I install stainless steel decorative sheets directly over existing tiles?
A: Not recommended. Existing tile surfaces are uneven and imperfections will telegraph through thin sheets. Install a flat substrate (plywood base board or leveled frame) before panel installation.
Q: Which installation method is best for elevator interiors?
A: For indoor elevator cabins with controlled humidity, the wood base backing method with adhesive attachment works well for panels up to 1.2mm thick. For high-traffic public elevators, the steel frame method provides additional durability.
Q: What seam gap should I leave between panels?
A: For indoor applications, 1.5-2mm for standard joints, 3-5mm for design joints. For outdoor applications, 5-8mm to allow for thermal expansion.
Q: Can I use regular screws to fix stainless steel panels?
A: Use only stainless steel screws for mechanical fixing to prevent galvanic corrosion. Regular steel screws will rust and stain the panel surface over time.
Conclusion
Proper installation of stainless steel decorative sheets requires selecting the right method for the application, using appropriate tools, paying careful attention to seam treatment, and adhering to timing requirements for protective film removal and adhesive curing.
For most indoor wall applications: The wood base backing method with full-coverage adhesive provides reliable results with proper substrate preparation.
For outdoor or large-scale applications: The steel frame method offers superior structural strength and durability.
For ceiling installations: Always use temporary props for at least 24-48 hours to ensure proper adhesive bonding.
Remember that the quality of installation directly impacts the final appearance and longevity of your stainless steel decorative panels. Careful planning, proper surface preparation, and attention to detail will ensure a professional result that meets the expectations of your clients.
If you require a more detailed installation tutorial in PDF format, please contact us; we are happy to provide you with a stainless steel installation tutorial.